

After a three-month hiatus, I recently continued development on the prototype for my digital community history project. I had created an initial concept and prototype for the platform during a Product Management Bootcamp earlier this year, after which I shifted my focus and energy to job applications.
Another reason I had hesitated to continue development on the project was my uncertainty about the technology that should power the proof-of-concept I would ask real people to use. Despite everything I’d learned about technical debt during the bootcamp, it took me a while to realize that, at this point, the stack does not really matter: I have to discover the limitations while people are actually using the application — without real-world-usage, it’s much harder to figure out what the software needs to be capable of. Instead of over-thinking and possibly over-engineering a solution, I therefore decided to continue to work on the prototype I built using Replit, the first (vibe coding slash) development platform I spent money on. In order to minimize risk of data-loss and prevent possible loss of trust with my earliest users, I do want to commit to the following requirements:
- The application should be secure enough to be used in a pilot project that I am planning to run in my own village, without risking exposure or loss of data in the form of audio, images or otherwise.
- Data and development infrastructure should not be dependent on Replit’s infrastructure alone. Replit is the (vibe) development platform I used to create the initial prototype, but I want to be able to move development and hosting elsewhere if the project requires it.
Asserting control over your own/generated code and data is always a good idea. A very practical reason to learn how to decouple your Replit project from the platform is the fact that, like every AI-service, Replit uses subscription-based and pay-as-you-go pricing mechanisms for its services: while hosting a published app is free under certain usage limits, AI-supported development and deployment cost credits. As soon as your monthly ‘budget’ runs out, you will basically pay for each further token used during continue development. Even when you choose to forego the agent and make manual edits in the editor, publishing any changes to your production app still costs — checks notes — 0,033 $ / day.
N.B. I have yet to verify if this applies to the development environment, so there might be some wiggle room there for purely manual updates.
Asking another AI agent to jump in after your Replit account has run out of credits
Entry-level subscriptions aren’t all that generous: AI compute costs money and a 25$ subscription obviously has its limits. Upon discovering that I was racing through my credits with Replit Agent 3 and would soon not be able to continue coding, I found out that it is possible to install and use Claude Code inside Replit’s remote development environment. While this arguably sounds a bit like this…
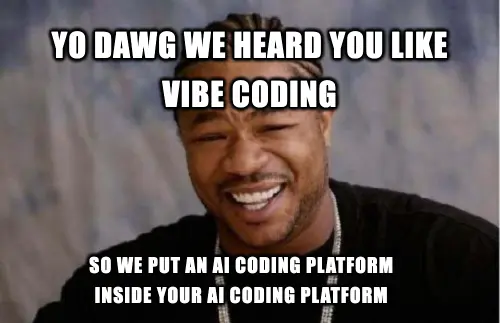
.. it makes sense if you consider that Replit just provides an environment and AI tools to build things on it. As such, Replit also provides users with a shell and allows them to install packages manually. The process is identical to installing Claude Code on your own computer, a single command does the trick: npm install -g @anthropic-ai/claude-code
After running this command, authenticating with Claude and giving it access to the workspace directory, I can work with Claude Code on my Replit-hosted codebase and spend unused tokens from my Claude subscription. Whether you install the package globally or as a dev dependency, Claude will remain available even after reopening the workspace. We can now ask Claude Code to give his opinion on the project so far, by prompting it to review the code produced by Replit’s AI. It should be mentioned, of course, that Replit’s Agent might very well be using one of Claude’s models behind the scenes, like we’re asking a student to do a peer-review of their own homework. It’s frontier/foundational models all the way down.
This strategy helps you to use credits across AI providers while wrking on a project. If I would run out of tokens to spend inside Claude code, I could theoretically try switching to Warp and Lovable — after subscribing to Lenny’s podcast, I have access to the pro tiers for these platforms too. But even if you have credit contingents with several AI providers, you will eventually run out of credits.
Vibe coding mobility: learning how to move your codebase around and work on it locally
The best way around this problem is to work on your project locally. As I am most comfortable with DDEV as a local development tool, I set out to configure a DDEV-environment for Replit app. Doing so would also allow me to spin up a local LLM for coding assistance, but that is not something I’m interested in currently.
With the help of several online resources and Claude, I was able to make this happen in under two hours. This speaks to the versatility of DDEV, which is first and foremost a docker-solution for local PHP development. It’s also a testament to the flexibility and developer-friendliness of Replit’s platform: even when it’s an opinionated platform when it comes to its default stack, there are no proprietary solutions that you are locked into. The generated solution is based on well-known best practices and widely available open-source JS solutions.
So how does one begin to un-Replit-ify ones project and turn it into something you can work on locally? Having gone through the process this morning, I can roughly break it down into the following five steps:
- Leverage Replit’s GitHub integration to ensure that your project files are synced to a GitHub repo
- Clone the repo locally and add DDEV configuration instructions for DDEV to host a NodeJS-server with Vite
- Modify the main project bootstrap files so that the app detects when it is running inside a DDEV environment: specifically, your app needs to work with a different hostname and swap out database configuration and credentials.
- Export the Postgres database that you have already and then import it to your local environment
- Run it!
Now that we’ve established what we want to do, and why, I will go over each of these steps in detail in Part II of this post.
Leave a Reply